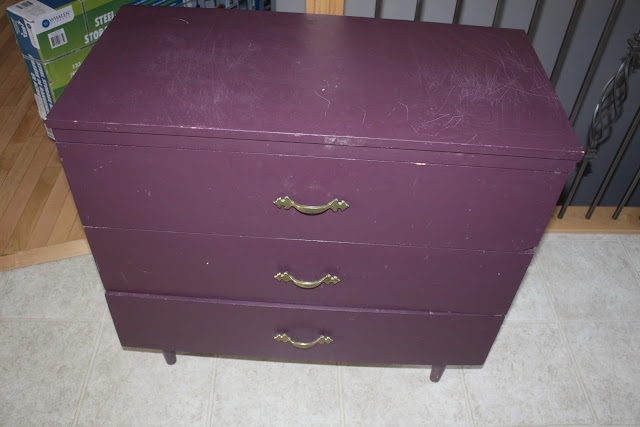
While browsing through Kijiji (like I always do) I came across this cute vintage dresser. It was previously painted purple and not the greatest paint job might I add. The top had been scratched and the paint was just....ugly!
I got it home and settled on a look I wanted to create. Little did I know this was going to be quite a process.
I removed the hardware and gave them a good spray with "Hammered Metal" to enhance their great features and make them a little more modern.
Next I removed the drawers and got ready to prime.
Here the drawers are primed.
I have been very intrigued by yellow lately and decided this piece needed to be bright and cheerful. This is after one coat of the yellow.
Here are the drawers after two coats.
Up until this point it was smooth sailing, everything I am used to doing and my process was coming along great...then I stepped outside my comfort zone!
I purchased a can of the Annie Sloan Soft Wax and decided to give it a try. I had no idea what to expect and I was quite nervous.
I knew I wanted to tone down the yellow paint because it was quite bright and I liked the look the dark wax gave...on Pinterest! (silly me to think recreating a look would be a breeze). I now have a higher respect for those artists!
If you do not paint furniture yourself let me tell ya, its not just "slap a bit of paint on, and call it a day". There are so many steps involved and different processes to get different results!
Here you can see the difference the wax makes in the color and how great it brings out detail. Well this is all fine and dandy right? I thought so too!
That is until I started the other side and this happened! Apparently if you touch the wet wax that is starting to dry with new wax it takes it off. OH NO!!! I thought I was finished for sure! I googled whatever I could and didn't really get a good answer, I let it sit all night and decided to look at it with a fresh perspective in the morning.
Instead I ended up thinking about it ALL night and woke with a pounding headache! How would I ever fix this problem? When I would rub my hand over it there was still a tacky, dragging feeling, my heart sank all over again!Is it not dry? Will this ever be fixed? With no hope left I began to buff it anyway just to see what would happen. What do I have to lose right?
Well low and behold I was pleasantly surprised! The buffing did take away the dragging feeling leaving it smooth to the touch even though I thought it wasn't dry. Not only that it started to blend in that spotted mess. Progress! (here you can see I only buffed the top right corner)
The lesson I learned....use very little wax and rub it in very good even if you think its going to take it all off and you'll be left with nothing...It wont!
Once the entire piece was buffed I decided to distress it. This is before I added more wax into the distressed areas.
Here they are after the wax had been reapplied to the edges and buffed out.
And here is the final product!
Lets have one more look back at where it came from hey? OK!
Before:
After:
This was quite a journey for me and I will admit at times I wanted to pull my hair out! But I needed my vision to work and I feel very happy with the end result. It took a ton of elbow grease, a mountain of patience and a wave of determination to keep this piece from breaking me! But I conquered it and I am so happy to say I have tried something new and now know what not to do next time!
I hope you enjoyed todays post, if you have any waxing tips please leave them for me in the comment section! I am always up for some new advice and tips.
Linking up to:


No comments:
Post a Comment
Thank you for checking out todays post! I would love to hear from you, please leave your comments or questions and I will try my hardest to respond to each one.
Christina